How to Batch Film an Entire Week of Content in One Morning
The biggest lie in social media advice for small businesses is that you need to show up online every single day.
You don't. You need to show up consistently. Those are different things — and the difference is what makes batch filming one of the most useful things a local vendor can learn.
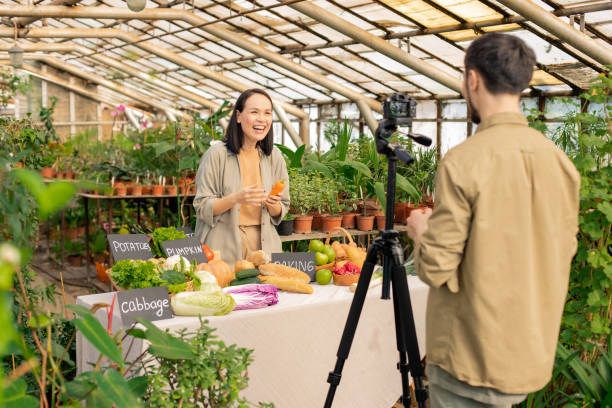
Batch filming means sitting down once — one morning, one hour, one focused session — and filming everything you need for the next week or two of content. Instead of picking up your phone every Tuesday and Thursday to figure out what to post, you film it all at once, edit it in one sitting, and schedule or save it for the week ahead.
It's how the vendors who seem to post effortlessly every week actually do it. Not willpower. Not extra time. A system.
Here's the full system, step by step.
Why Batch Filming Works
When you try to create content in real time — film, edit, caption, post — you're doing four cognitively different things back to back. Each one requires a different mode of thinking. Switching between them constantly is exhausting and slow.
Batch filming separates those four tasks into distinct sessions:
Session 1: Film (visual, physical, doesn't require words)
Session 2: Edit (technical, sequential)
Session 3: Write captions (verbal, creative)
Session 4: Post or schedule (administrative)
When you do each task in its own block, you get faster at each one, you stay in flow longer, and the overall time investment drops significantly. What takes 45 minutes per post in real time takes 15 minutes per post when batched.
For a local vendor, that's the difference between social media feeling like a second job and social media feeling manageable.
What You Need Before You Start
A content plan. Before you film a single clip, know what you're making. Write down three to five content ideas. Not elaborate outlines — just a sentence each. "Showing how I package orders before market." "Talking to camera about why I started." "Close-up product shots of the new batch."
If you have the Hook Vault, pull three hooks before you start filming. Each hook becomes the anchor for one piece of content. The hook tells you what the video needs to say — everything else is just footage.
Your filming location set up. Pick one or two spots where you'll film. Natural light is your best friend — near a window, on your porch, at your workbench where the light is good. Clear any clutter from the background. Have your products, your tools, or whatever you're showcasing within reach.
Your trending audio picked. Choose your audio before you film, not after. The audio you choose changes how you edit the footage — the pacing, the cut points, the energy. Knowing the audio in advance means filming with that rhythm in mind, which makes editing dramatically faster.
Your phone charged and your storage cleared. Nothing breaks a filming session faster than a full phone or a dead battery.
The Morning Plan — 90 Minutes Start to Finish
This is a realistic batch filming morning that produces five pieces of content.
Minutes 0–10: Set up and first clips
Don't overthink the setup. Find your light, put your products where they look good, check that your background is clean. Take a 30-second test clip and watch it back. Adjust if you need to. Then start filming.
Your first clips should be your easiest ones — detail shots. Close-ups of your product, your hands, your process. These require almost no thinking and they warm you up for the more intentional clips to come. Film 10–15 of these without stopping to review any of them.
Minutes 10–40: Your main content clips
Now film the actual content for each of your five pieces. For each one:
Film a talking-head clip (you speaking to camera, 30–60 seconds)
Film two or three B-roll clips that support what you said (your hands doing something, your product, your environment)
Move to the next piece
Don't try to get every clip perfect. Film each thing twice and move on. You can always use the second take. You cannot get time back by standing in front of your phone for four minutes trying to film the perfect one-take clip.
Minutes 40–60: Fill-in clips
These are the clips that make your content feel full — market setup, products being arranged, packaging, texture shots, the overall scene of what you do. Film these without any specific piece of content in mind. They're the connective tissue that makes B-roll editing fast and flexible.
Walk through your space and film everything that looks interesting. Your hands. Your product line. The way light hits your jars. Your workspace. These clips take thirty seconds each and give you material to work with across multiple posts.
Minutes 60–90: Edit
Import everything to CapCut or Instagram Reels. For each piece of content:
Add your trending audio first
Drop in your main talking-head clip, trimmed tight
Cut in two or three B-roll clips
Sync the cuts to the beat
Add one line of text if needed
Export
Five Reels in 30 minutes is achievable once you've done this two or three times. The first batch will take longer. The second one will be noticeably faster. By the third, you'll have a system that feels like second nature.
What to Do with the Footage After
Save everything — even the clips you don't use this week. B-roll footage doesn't expire. A shot of your hands arranging products that you filmed today is just as usable three months from now.
Create a folder on your phone or in Google Drive labeled "Content Library" and drop every clip in there after each filming session. Over time, this library becomes your insurance policy against the blank screen. When inspiration runs dry, the footage is already there.
The Captions Come Last
Write all five captions after the editing is done — not before, not during. Writing captions while you're filming breaks your concentration. Writing them all at once, when you already know what's in each video, is fast.
For each caption, start with a hook from your vault. Fill in the blank. Write two or three sentences that connect the hook to what's in the video. End with one response prompt. Done.
Five captions in under thirty minutes once you know your hook and you've already watched the video.
The One Shift That Makes This Sustainable
Batch filming only works if you protect the morning you set aside for it.
Put it on your calendar the same way you'd put a market day on your calendar. Block it. Don't schedule anything else during it. Treat it like a business appointment, because that's exactly what it is.
One morning every week or every two weeks. Ninety minutes. Five pieces of content.
That's the whole system. That's how the vendors who seem to have it figured out actually do it.
Happy Idaho creates resources for local Idaho makers, farmers, and vendors who want to show up online without it taking over their life. The Local Launch membership gives you monthly trending audio picks, 100 fill-in-the-blank hooks, and a community to keep you accountable. $25/month.
→ Join at happyidaho.com/local-launch